
If you’re a do-it-yourself enthusiast or a professional carpenter, you’ve likely come across the term «tung oil.» This natural product is renowned for its ability to enhance the beauty of wood, but it cannot be obvious to use if you’re not familiar with it.
In this blog post, we will explore what tung oil is, how to use it, how to paint with it, how to remove it, where to find it, and how to deal with it.
Contents
Tung Oil: The What
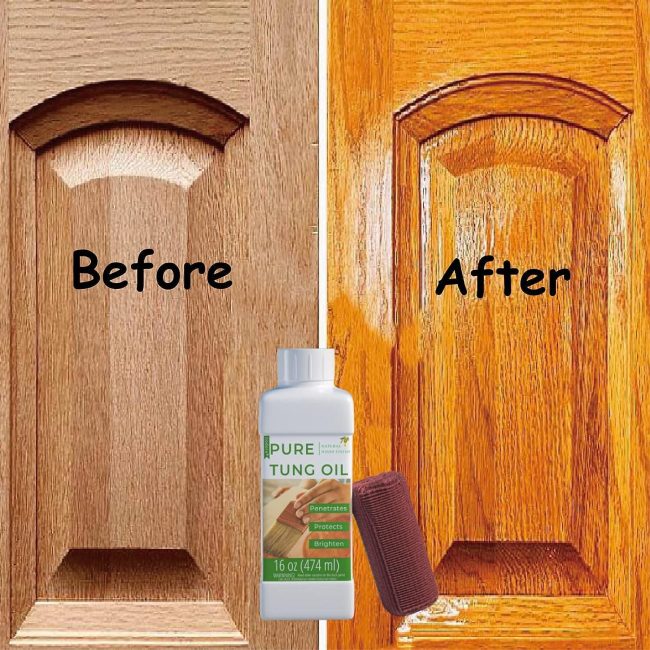
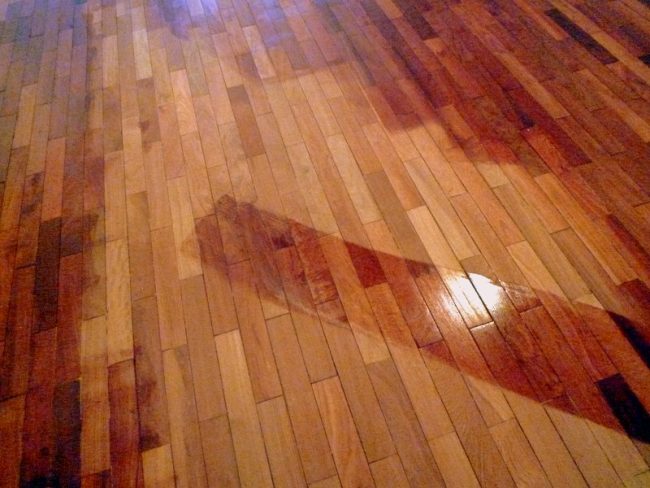
Have you ever wondered where the magical tung oil originates from? Let’s take a virtual journey to East Asia, where the native tung tree grows. This remarkable tree produces seeds laden with oil. When these seeds are pressed, the result is an oil with a captivating honey-like hue, an absolute marvel for treating wood.
Now imagine this oil seeping into your woodwork, filling every pore and crevice, and creating a robust, flexible finish that is highly resistant to water damage. That’s the power of tung oil.
However, it’s important to note that patience is critical when using tung oil, as it only dries as quickly as other wood finishes. But isn’t a stunning wood piece that glows with the richness of its natural grain worth the wait? Surely it is!
How to Use Tung Oil
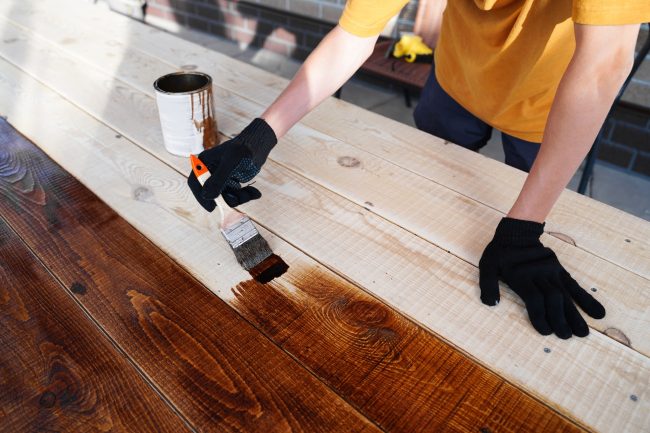
Dive into the world of tung oil application and uncover its simple steps. To kick off your project, start by smoothing your wood surface with sandpaper to create the perfect canvas. Be sure to remove all the dust – you want the oil to bond with the wood, not the dust particles.
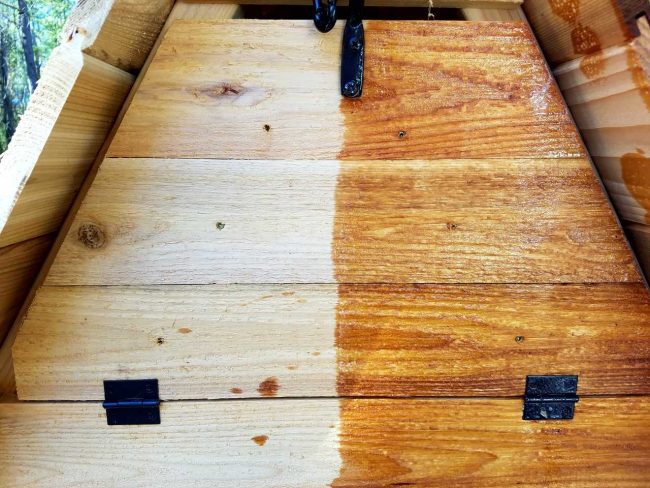
Once your surface is smooth and clean, it’s time for the main event. Grab a lint-free cloth and dab a modest amount of tung oil onto it. As you apply the oil, follow the wood grain to emphasize its natural beauty.
A top tip is to let the oil absorb into the wood for about half an hour. This allows the oil to permeate deeply into the wood’s pores, providing a rich and long-lasting finish.
Remember to wipe off any surplus oil before you rush to the next step. Over-application of oil can leave a sticky residue and won’t hasten the drying process. Remember, we talked about patience in the previous section? Here’s where it comes into play again.
One coat of tung oil may not achieve your desired finish. Don’t fret – apply additional coats. However, a golden rule is to let each layer dry thoroughly before moving on to the next.
Using tung oil might require time and patience, but the results are worth it. Your wood will thank you for the care you’ve given it, rewarding you with a stunning finish that highlights its natural grain and charm. Enjoy the process and look forward to a beautiful end product that resonates with the warmth of tung oil magic.
Painting with Tung Oil
Are you unleashing the artist within? Consider the glossy charm of tung oil to add an artistic flair to your masterpiece. Before you start, ensure your surface is immaculately clean and well-sanded. This prepares the canvas for your artistry and ensures the paint and oil amalgamate smoothly with the wood.
Next, you’ll need to create your paint mixture. Stir in the paint of your choice with tung oil, considering the oil’s glossy nature. This sheen is a trait of tung oil and will significantly impact your paint’s finish. So, opt for a paint that complements this high-gloss finish.
Let’s dip that brush now, shall we? Glide the paint-oil mix onto your surface using smooth, even strokes. Don’t be too heavy-handed – thin layers are the way to go. And remember, we’re not racing against time here. Patience is your ally. Give each layer ample time to dry before you advance to the next.
Finally, step back and admire your artwork. Allow the surface to fully dry once you’re content with the coverage and hue. You’ll notice the tung oil lending a unique vibrancy to your paint, making the colors pop while giving the finish a glossy appeal. Remember, perfection comes with patience. So, let that art piece dry well and marvel at the magic you’ve created with the simple addition of tung oil.
Removing Tung Oil

There may come a time when you want to bid farewell to the old tung oil finish. Perhaps you’re looking for a change, or the finish has lost its sheen over the years. Whatever the reason, we’ve got you covered.
The process requires some elbow grease, but the outcome will be a fresh, ready-for-anything wooden surface.
To kickstart the process, you’ll need a chemical stripper specifically formulated for oil-based finishes. It’s always wise to adhere to the manufacturer’s instructions regarding the application.
Typically, you must coat your wooden surface generously with the stripper, allowing it to sit and work its magic for a specified period. This pause in the process is essential, giving the stripper ample time to break down the tung oil finish.
After letting the stripper do its job, the once vibrant tung oil finish looks quite different. This is your cue to step in with a plastic scraper. Gently glide the scraper across the surface, removing the loosened tung oil. Be careful not to apply too much pressure, as you don’t want to harm the underlying wood.
It’s time for a light sanding session when you’re satisfied that you’ve removed as much of the tung oil as possible. Sanding will eliminate any stubborn traces of oil and leave you with a beautifully bare wooden surface, ready for its next adventure. Remember, this process is about patience and precision, but your reward will be a fresh canvas to create your next masterpiece.
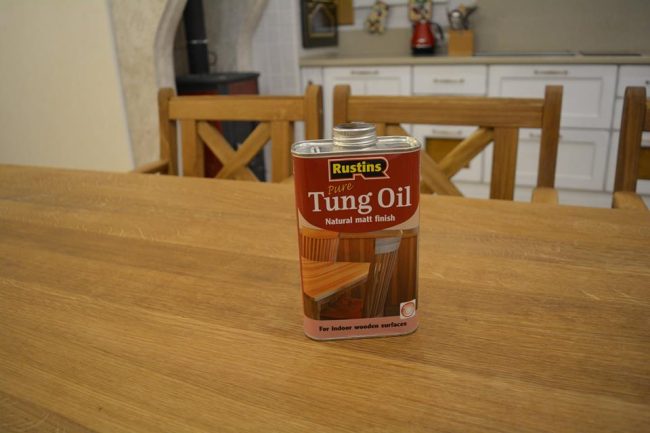
Where to Find Tung Oil
In your quest for the perfect wood finish, you may wonder, “Where can I find tung oil?” The answer is closer than you think. In all its golden glory, Tung oil is conveniently available at most hardware stores and home improvement outlets.
So, whether you’re a frequent visitor to your neighborhood’s Lowe’s or prefer the extensive range available at The Home Depot, you’ll find the magical tung oil waiting for you there. And for those who enjoy shopping from the comfort of their homes, many online platforms, like Amazon, eBay, and even Etsy, offer an impressive array of tung oil products.
However, while embarking on your shopping endeavor, remember that not all products labeled ‘tung oil’ are created equal. You’ll encounter a variety of tung oil options, each serving a different purpose.
While pure tung oil, extracted directly from the tung tree seed, offers a highly durable and water-resistant finish, it does take longer to dry and requires more coats. On the other hand, you’ll find tung oil finishes, which are mixed with different solvents. These are quicker to dry and easier to apply but offer extra protection.
So, how can you make sure you’re getting the real deal? Keep your eyes peeled for products labeled «100% tung oil». This ensures you’re purchasing pure tung oil and not a mixture. Remember, the best results come from the best products. So, whether you’re restoring a cherished antique or creating a new masterpiece, keep the quality of your tung oil high. The journey to a spectacular wood finish begins with the right bottle of tung oil. Happy shopping!
Sealing with Tung Oil
Delving into the final stage of your tung oil adventure, let’s explore the sealing world. This final flourish in your tung oil journey crowns your hard work with lasting protection.
So, you’ve meticulously applied your desired coats of tung oil, marveled at how each layer brought out the wood’s natural beauty and patiently waited for each coat to dry. Now, it’s time to seal the deal!
The sealing stage requires you to apply one final protective coat of tung oil. Think of this as your wood’s bodyguard, standing guard against water damage and ensuring the durability of your finish. However, allowing all your previous coats to dry entirely is crucial before you proceed to this stage.
Once you’re sure your surface is dry, it’s time to whip out your trusty lint-free cloth and lovingly apply that last coat of tung oil. As with the previous applications, follow the wood grain to ensure a harmonious finish. Once you’ve used the sealant, step back, take a deep breath, and let patience be your companion again.
The sealing coat of tung oil requires several days to dry thoroughly. It might seem like a long wait, but it’s worth it. Remember, good things take time, and this process is no exception.
While you wait, envision the splendid end product — a wooden surface gleaming with a natural sheen, highlighting the captivating patterns of the grain, and armored with a coat of protection. This is the beauty and durability that tung oil promises and doesn’t disappoint.
By now, you should be a pro at navigating the fascinating world of tung oil. From understanding what it is, knowing where to find it, mastering how to use it, to painting and sealing with it, you’re well-equipped to create masterpieces.
So, go on and embark on your next DIY project. Let the magic of tung oil transform your woodwork and weave stories of charm and durability. Happy sealing!


