

Chrome paint’s glossy shine can turn any object into a standout piece, giving it a fresh and sleek appearance. However, the durability of chrome paint depends significantly on the sealing process. Proper sealing is critical to ensuring your chrome paint job lasts for years.
In this ultimate guide, we’ll walk you through everything you need to know about chrome paint, from making your own to removing it and, most importantly, how to seal it for lasting results.
Contents
What is Chrome Paint?

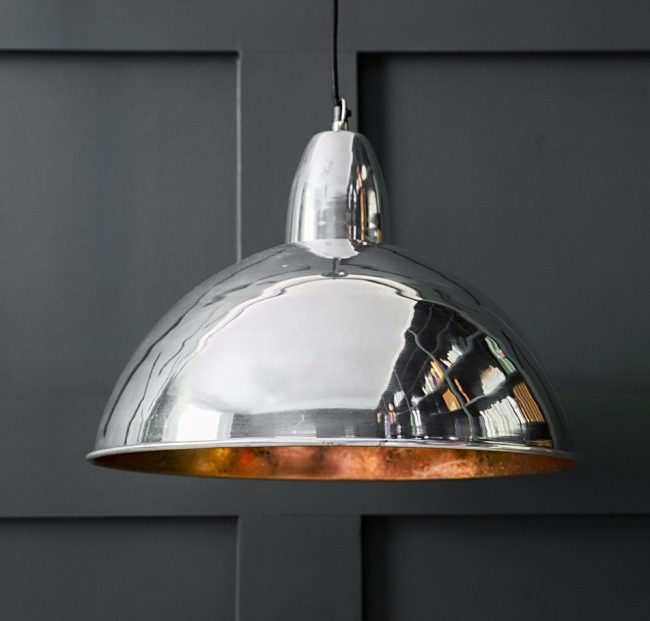
What exactly is this shiny substance known as chrome paint? Often dubbed spray chrome, this unique type of paint imparts a lustrous, mirror-like finish to the surfaces it graces. The magic of chrome paint lies in its capacity to transform a diverse range of materials—be it metal, plastic, or wood—into reflective masterpieces.
The versatility of chrome paint, coupled with its exceptional shine, makes it a go-to choice for those looking to add a touch of glamour to automotive details, craft pieces, or even home decor items. With chrome paint, the possibilities to create and innovate are limitless.
Making Your Chrome Paint

Taking the DIY route with chrome paint is feasible and can be an exciting experiment! For the adventure seekers looking to mix their shiny, reflective chrome paint, you will need some essential ingredients: silver nitrate, distilled water, and ammonium hydroxide.
Start by mixing equal portions of silver nitrate and distilled water. As these two ingredients interact, you’ll notice the solution taking on a new form. Now, the next part is crucial. Gradually add ammonium hydroxide, drop by drop. As you do this, a residue will begin to form.
The concoction then needs a reducing agent to be ready for application. But remember, safety comes first! Always equip yourself with proper safety gear like gloves and eye protection when handling these chemicals.
Once your solution is ready, it’s time for the fun part — application! The homemade chrome paint is applied just like any other spray paint. Take your time with the process, take your time to ensure a smooth, even application.
Embarking on this DIY chrome paint journey adds a personal touch to your project and offers a deeper understanding of the process. However, be prepared for some trial and error.
But don’t be disheartened; the satisfaction of creating your chrome paint is truly unmatched! After all, a little bit of science, coupled with some creativity, can yield impressive results.
Steps to Painting with Chrome
Dipping your toes into the world of chrome painting might feel intimidating at first, but fear not, we’ve got your back! Preparing your canvas correctly is critical to ensure a sleek, mirror-like finish.
Firstly, thoroughly cleanse the surface of the object you wish to transform, providing it’s free from dust, dirt, or grease. Allowing the surface to dry completely is paramount before proceeding to the next step.
Next, add a layer of primer to the clean surface. Think of primer as the key that allows chrome paint to adhere flawlessly to your object. Allow the primer to dry completely before you move on to the main event.
Now comes the exciting part! Once your primer has thoroughly dried, it’s time to bring on the shine. Apply your chrome spray paint sweepingly, ensuring the application is even across the surface.
When it comes to chrome paint, less is more! Applying multiple thin coats rather than one thick, heavy coat is advisable. This strategy helps you achieve that coveted smooth, reflective finish and prevents the paint from dripping or running.
Once you’ve finished painting, allow ample time for the paint to dry. Rushing this process could result in smudges or fingerprints on your shiny new surface.
Keep in mind that patience is vital in this journey. While it might take a little longer, the dazzling results will make the wait worthwhile. With these easy steps, you’ll have a beautifully chromed object that will catch everyone’s eye!
How to Remove Chrome Paint
There comes a time when a fresh start is required, be it from a simple error or a desire to switch things up. Worry not, removing chrome paint is as effortless as applying it. The method is straightforward: employ a paint thinner or a specialized paint stripper.
Start by soaking a cloth in the paint remover of your choice. With a gentle touch, massage the fabric into the chrome-painted area. You’ll start to notice the paint loosening its grip and softening up. At this point, reach for a plastic scraper.
Use it to gently lift the paint from the surface, taking care not to damage the object beneath. It’s time to clean up once you’ve successfully scraped off the paint. Arm yourself with some soapy water and wash off any remaining residue of the paint or paint remover.
And voila, you have a clean canvas, ready to embark on a new chrome painting adventure or enjoy its original state. Remember, each step in the chrome paint journey, even the missteps, adds to the final masterpiece!
Sealing Chrome Paint for Longevity
You’ve made it to the finish line, and now it’s time for the crowning glory — sealing your chrome paint. A critical step not to be missed, it’s the ultimate guard that ensures your labor of love lasts through the sands of time. A suitable sealant doesn’t just provide a shield, it adds an extra layer of shine, enhancing the gleaming chrome finish.
The sealant of choice for most chrome painting aficionados is clear lacquer. This nifty substance doubles as both a protector and an enhancer.
Like the base layer of primer and the chrome paint itself, the lacquer must be applied in thin, even coats. Patience is the name of the game here. Allow each layer of lacquer to dry thoroughly before you use the next.
However, avoid the temptation of applying too much lacquer in one go. An excess amount can lead to it running or dripping, sabotaging the pristine, mirror-like finish you’ve worked so hard to achieve.
Applying the sealant is as simple as it sounds. Start by spraying a thin layer over the surface, ensuring it covers the entire area. Let it dry thoroughly before adding the next coat. The number of layers needed depends on several factors, including the object’s exposure to the elements and intended use.
Finally, safety should never be an afterthought, as every step should always be considered. When applying the sealant, remember to work in a well-ventilated area and equip yourself with protective gear, such as gloves and safety goggles.
And there you have it, the secret to giving your chrome paint the longevity it deserves. With this protective layer, your shiny masterpiece is ready to dazzle and stand the test of time. Happy sealing!
How Long Does Chrome Paint Last?
Are you curious about the longevity of that dazzling chrome finish? Several factors, including the paint quality, application process, and maintenance, greatly influence the lifespan of chrome paint. But the linchpin to its longevity? That’s right, the sealing.
Sealed chrome paint can gleam for years, ranging from one to five years, if not longer. However, just like everything else in life, it isn’t immune to the toll of time and external factors. When exposed to harsh elements or chemicals, the shiny surface may experience premature aging.
Regular cleaning and maintaining your chromed treasures can extend their lifespan, keeping them gleaming like new.
So, while chrome paint does indeed have an expiration date, with meticulous care and attention, its lustrous shine can adorn your items for years to come. Now that you’re armed with this knowledge, here’s to years of shiny chrome brilliance!


